Grading, Irrigation and Drainage
Land grading is reshaping the surface of land to planned grades for irrigation and subsequent drainage. Land grading permits uniform and efficient application of irrigation water without excessive erosion and at the same time provides for adequate surface drainage.
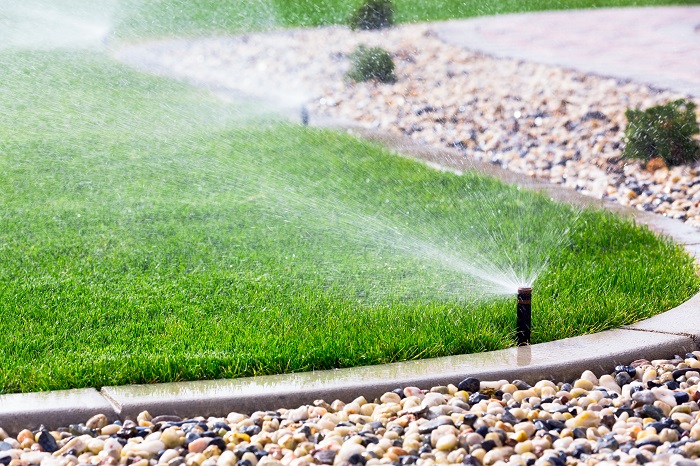
Surface Water Drainage and Slope
The first step you should take when planning a drainage system is to identify low spots in the landscape. If obvious low spots exist on the property, the water must have a way to exit those areas. If you don't install drainage, a puddle probably will develop whenever it rains.
You create surface drainage by grading an area so that water collects and flows to a lower elevation away from the site. Regardless of surface characteristics, when it comes to surface drainage, slope is the most important issue to consider. For efficient drainage, paved surfaces should have a minimum 1-percent slope. Turf or landscaped areas should have a minimum slope of 2 percent.
"Shoot" the grade. Because slope is so important for drainage, a transit or level is good to have on hand to "shoot" grades. It is also the best way to find the absolute lowest spot in a potential drainage area. Exceeding the 2-percent standard by too much can cause erosion problems. Slopes of more than 4 or 5 percent will seem very steep in most landscape situations.
Calculate the slope. Each foot of elevation drop over a 100-foot length is 1 percent. Therefore, it takes 2 feet of elevation change over each 100-foot length of a swale to create a 2-percent slope. If the distance is 10 feet, you'll need a fall of 0.2 feet (roughly 2.5 inches) to create a 2-percent slope.
Grade the area. Areas that will be paved, such as driveways or parking lots, are easy to surface drain by simply grading them so they slope away from structures and toward a lawn, storm sewer or street gutter. In open turf areas, you can create a swale by making a downward-sloping "crease" in the landscape where water will collect and flow to lower ground. If water flows to an area where it cannot completely exit the site, you can install a catch basin and pipe so the water will drain to its ultimate destination.
Control erosion. Immediately after you create a swale, you should install stone or sod, sow seed or design other means of stabilizing the area.
Popular Drainage System - The French Drain
The French drain is a time-honored system for eliminating excess water from low points and other areas prone to saturated soil. French drains are quite simple: in essence they are just trenches filled with gravel, with sand on top of that. Often, you'll see French drains defined to include a drain pipe as well, though the traditional design is simply the gravel-filled trench. The advantages of French drains are low cost and easy installation. In addition, they can be covered over with turf after installation, making them less conspicuous.
Dig the trench: A French drain starts with digging a trench. The depth and width of the trench can vary, but 5 to 6 inches wide and 8 to 12 inches deep are common sizes and usually satisfy most needs.
Ensure proper slope: Grading is a critical consideration. You must ensure that enough slope exists for the water to actually flow, and flow in the right direction. It might be adequate to check very short stretches of drain with a level to ensure that a slope exists to carry water in the desired direction. However, you should take whatever measures are necessary, including a survey and grading, if needed, to ensure that you have at least a 0.5 percent slope. A 1 or 2 percent grade is better.
Fill with gravel: Add gravel to the trench to within a few inches of the surface. Gravel for this use is typically 0.5 to 1 inch in size.
Top off with sand: On top of the gravel, lay at least 3 or 4 inches of coarse sand. This provides a medium in which turf can grow so that the trench will not be visible. But remember that the sand must be coarse or it won't allow water to properly drain through.
Turf the trench: Turf may be seeded into the sand or simply allowed to grow in from the adjacent sand, if the turf is a spreading type. Or, you can lay sod.
Adding a drain pipe: If you wish to use drain pipe, the process is similar to that just described, except you will first lay an inch or two of gravel in the bottom of the trench, on which a perforated drain pipe will rest. The drain pipe may be wrapped in a filter fabric. Then, finish filling in with gravel around the pipe, ensuring at least 1 inch of gravel surrounds the pipe on all sides. 4- or 6-inch drain pipes are commonly used, and are easily accommodated by 6- to 8-inch trenches.Be sure to run the upper end of the drain pipe to the surface and cap it so that you can, if necessary, access the pipe to unclog it. Preferably use rigid, smooth wall pipe because it will have a tendency to carry a grade better and will not silt in as easily. This is essential for long-term proper drainage where larger volumes of water may need to go down the pipe. 6 inch is preferred over 4 inch.
It is also important to note that future electric, irrigation or drainage sleeves are needed to be put under sidewalks and driveways for future installation. Because we pour concrete sidewalks and driveway before doing irrigation and landscape, these sleeves are essential.
Don't get in over your head: Consider hiring a site engineer or similar professional for complex systems that cover large areas and require multiple lines. Proper grading, pipe-sizing and other design factors can make or break a complex drain system.

Bridge the Gap

Understanding your vision for a dream home is key. At Home Builder Assist and HBA Construction, we're dedicated to making that vision a reality by combining your ideas with our expertise to achieve your goal.
Right for me?

Determining if a program is suitable for you involves assessing your goals, needs, and interests against the program's offerings, structure, and outcomes. Here are some questions to ask yourself first.

|
|
Construction Consultant DANA PALMER Office (830) 507-5956 FREQUENTLY ASKED QUESTIONS * EVENTS * BUILDING TERMS
|